Pie Pastry (Basic)
 This recipe is from a copy of The Canadian Cookbook which my Uncle Johnny gave to my Mom for Christmas in 1975. ((In a strange coincidence, I won a copy of the exact same book at a pie-making competition where the pie I’d entered used this pastry recipe!)) I’ve copied it directly with a couple of side notes where I differ from the ladies who wrote the recipe.
Trust me when I say you should not go check with Martha or any of the other gods of the food world; just trust me and the 1970s, and follow this recipe to the letter, and you will have a pretty good pie crust. If you make it regularly, you’ll have a totally amazing pie crust (it takes a practiced hand).
If you go buy a pie crust from the freezer section of a grocery store, you’re going to end up with a sub-par pie, no matter how tasty the filling is. So don’t be a chump; make your own pie pastry.
And oh yeah: a pastry blender is like, five bucks, and it is so awesome to have it. It’s one of the few single-purpose kitchen gadgets I’d recommend.
This recipe makes 2 nine-inch pie shells, or one double crust.
Pie Pastry (Basic)
- 2 cups (240g – 250g) all-purpose flour
- 3/4 (170g) cup cold butter (or other fat)
- 1/4-1/3 cup very cold water
- 1 teaspoon salt
- Sift flour and salt into a bowl; add cold butter; cut into the flour with a pastry blender or with two knives until, when the bowl is shaken, no pieces larger than a pea appear (Cutting the butter too finely or creaming it into the flour will give a cookie-type crust known as short pastry. Flaky pastry requires small lumps of cold fat to trap layers of air.).
- Measure the water. Sprinkle it over the flour. Mix the flour up from the bottom of the bowl with a fork. As some of the mixture appears to stick together, push it to one side and sprinkle the dry flour with water. Too much moisture makes tough pastry; too little, and the dough will be hard to roll out. Experience helps determine the right amount.
- When the flour appears damp, press it together into a ball; break the ball open; if it crumbles apart more water is required; shape all the dough into a ball but do not knead it.
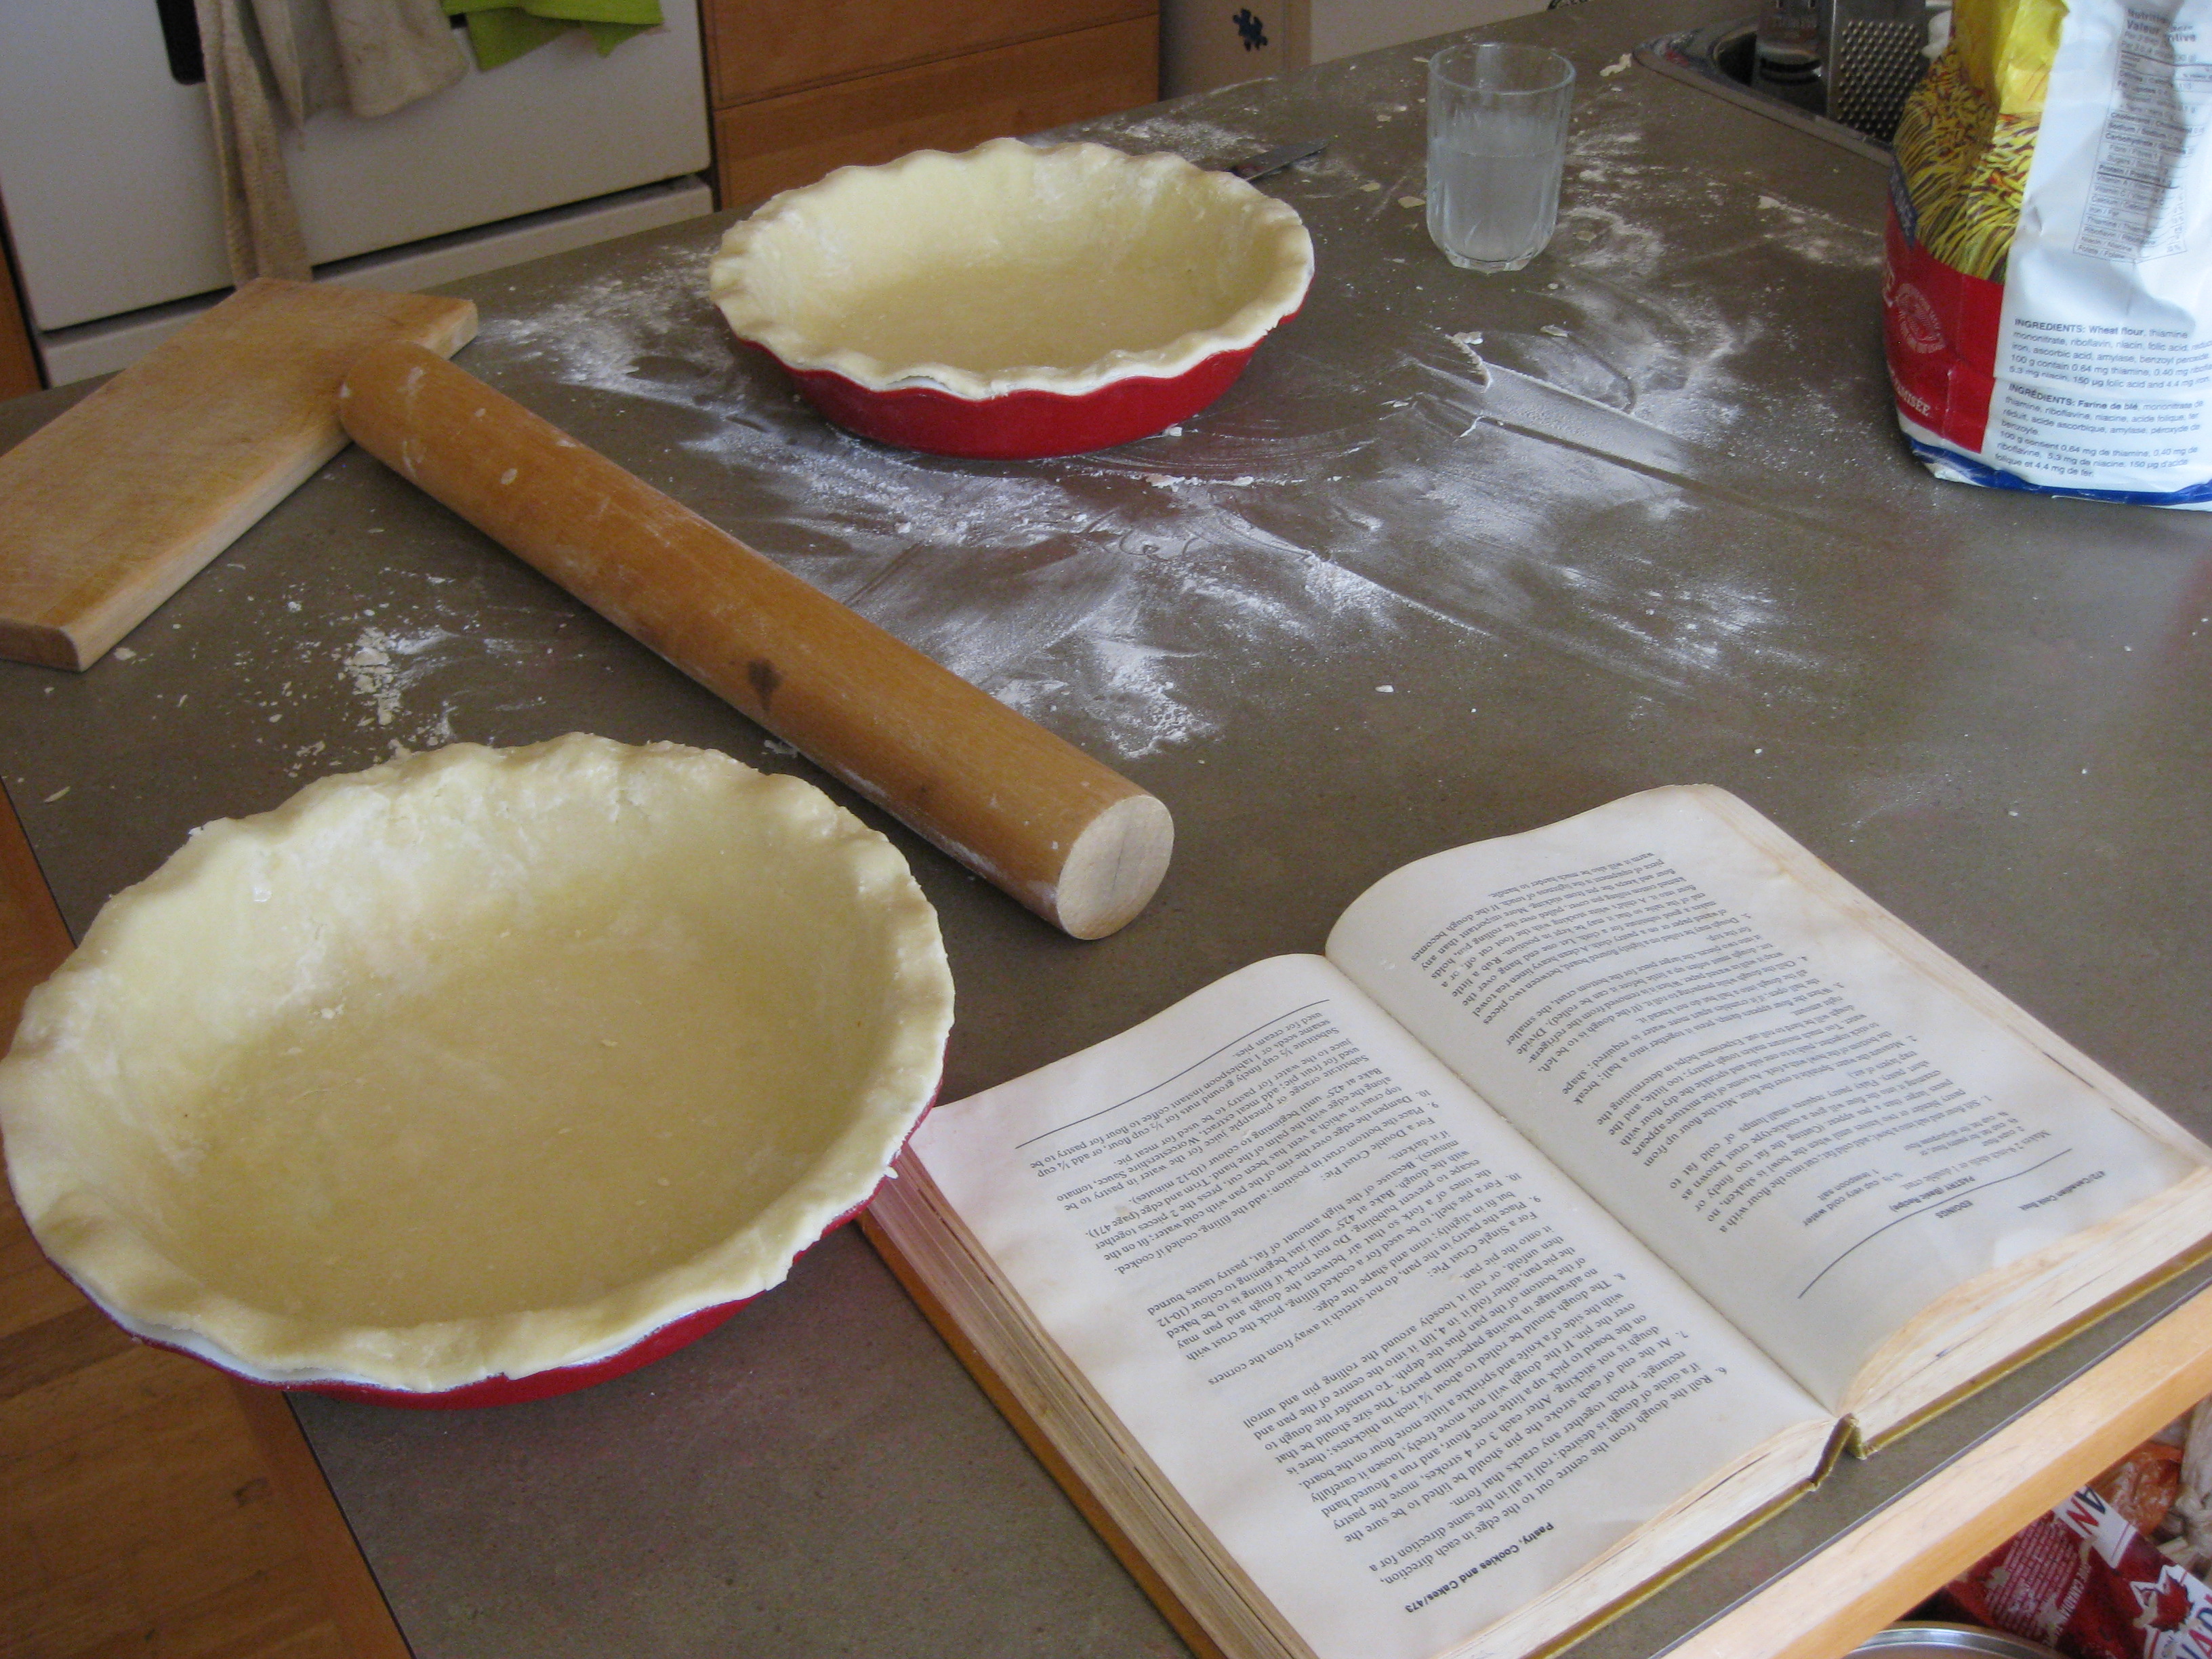
- Chill the dough while preparing to roll it (If the dough is to be left, wrap it well in waxed paper. When it is removed from the refrigerator, dough must soften up a little before it can be rolled). Divide it in two pieces, the larger piece for the bottom crust, the smaller for the top.
- Dough may be rolled on a lightly-floured board, between two pieces of waxed paper or on a pastry cloth. A clean heavy linen tea towel makes a good substitute for a cloth. Let one end hang over the end of the table so that it may be kept in position. Rub a little flour into it. A child’s white stocking with the foot cut off, or a knitted cotton rolling pin cover pulled over the rolling pin holds flour and keeps the pin from sticking. More important than any piece of equipment is the lightness of touch. If dough becomes warm it will also be much harder to handle.
- Roll the dough from the centre out to the edge in each direction, if a circle of dough is desired; roll it all in the same direction for a rectangle. Pinch together any cracks that form.
- At the end of each stroke the pin should be lifted to be sure the dough is not sticking. After each 3 or 4 strokes, move the pastry on the board to pick up a little more flour, and run a floured hand over the pin. If the dough will not move freely, loosen it carefully with the side of a knife and sprinkle a little more flour on the board.
- The dough should be rolled out to about 1/4 inch in thickness; there is no advantage in having paper-thin pastry. The size should be that of the bottom of the pan plus the depth. To transfer the dough to the pie pan, either fold it in 4, lift it into the centre of the pan and then unfold, or roll it loosely around the rolling pin and unroll it onto the pie pan.
- Place the bottom crust in position; add the filling, cooling if cooked [Candace’s note: when I make a pie, I generally like to bake the bottom crust for 15 minutes before the filling goes in. It’s a personal preference, but I find the crust is much tastier my way].
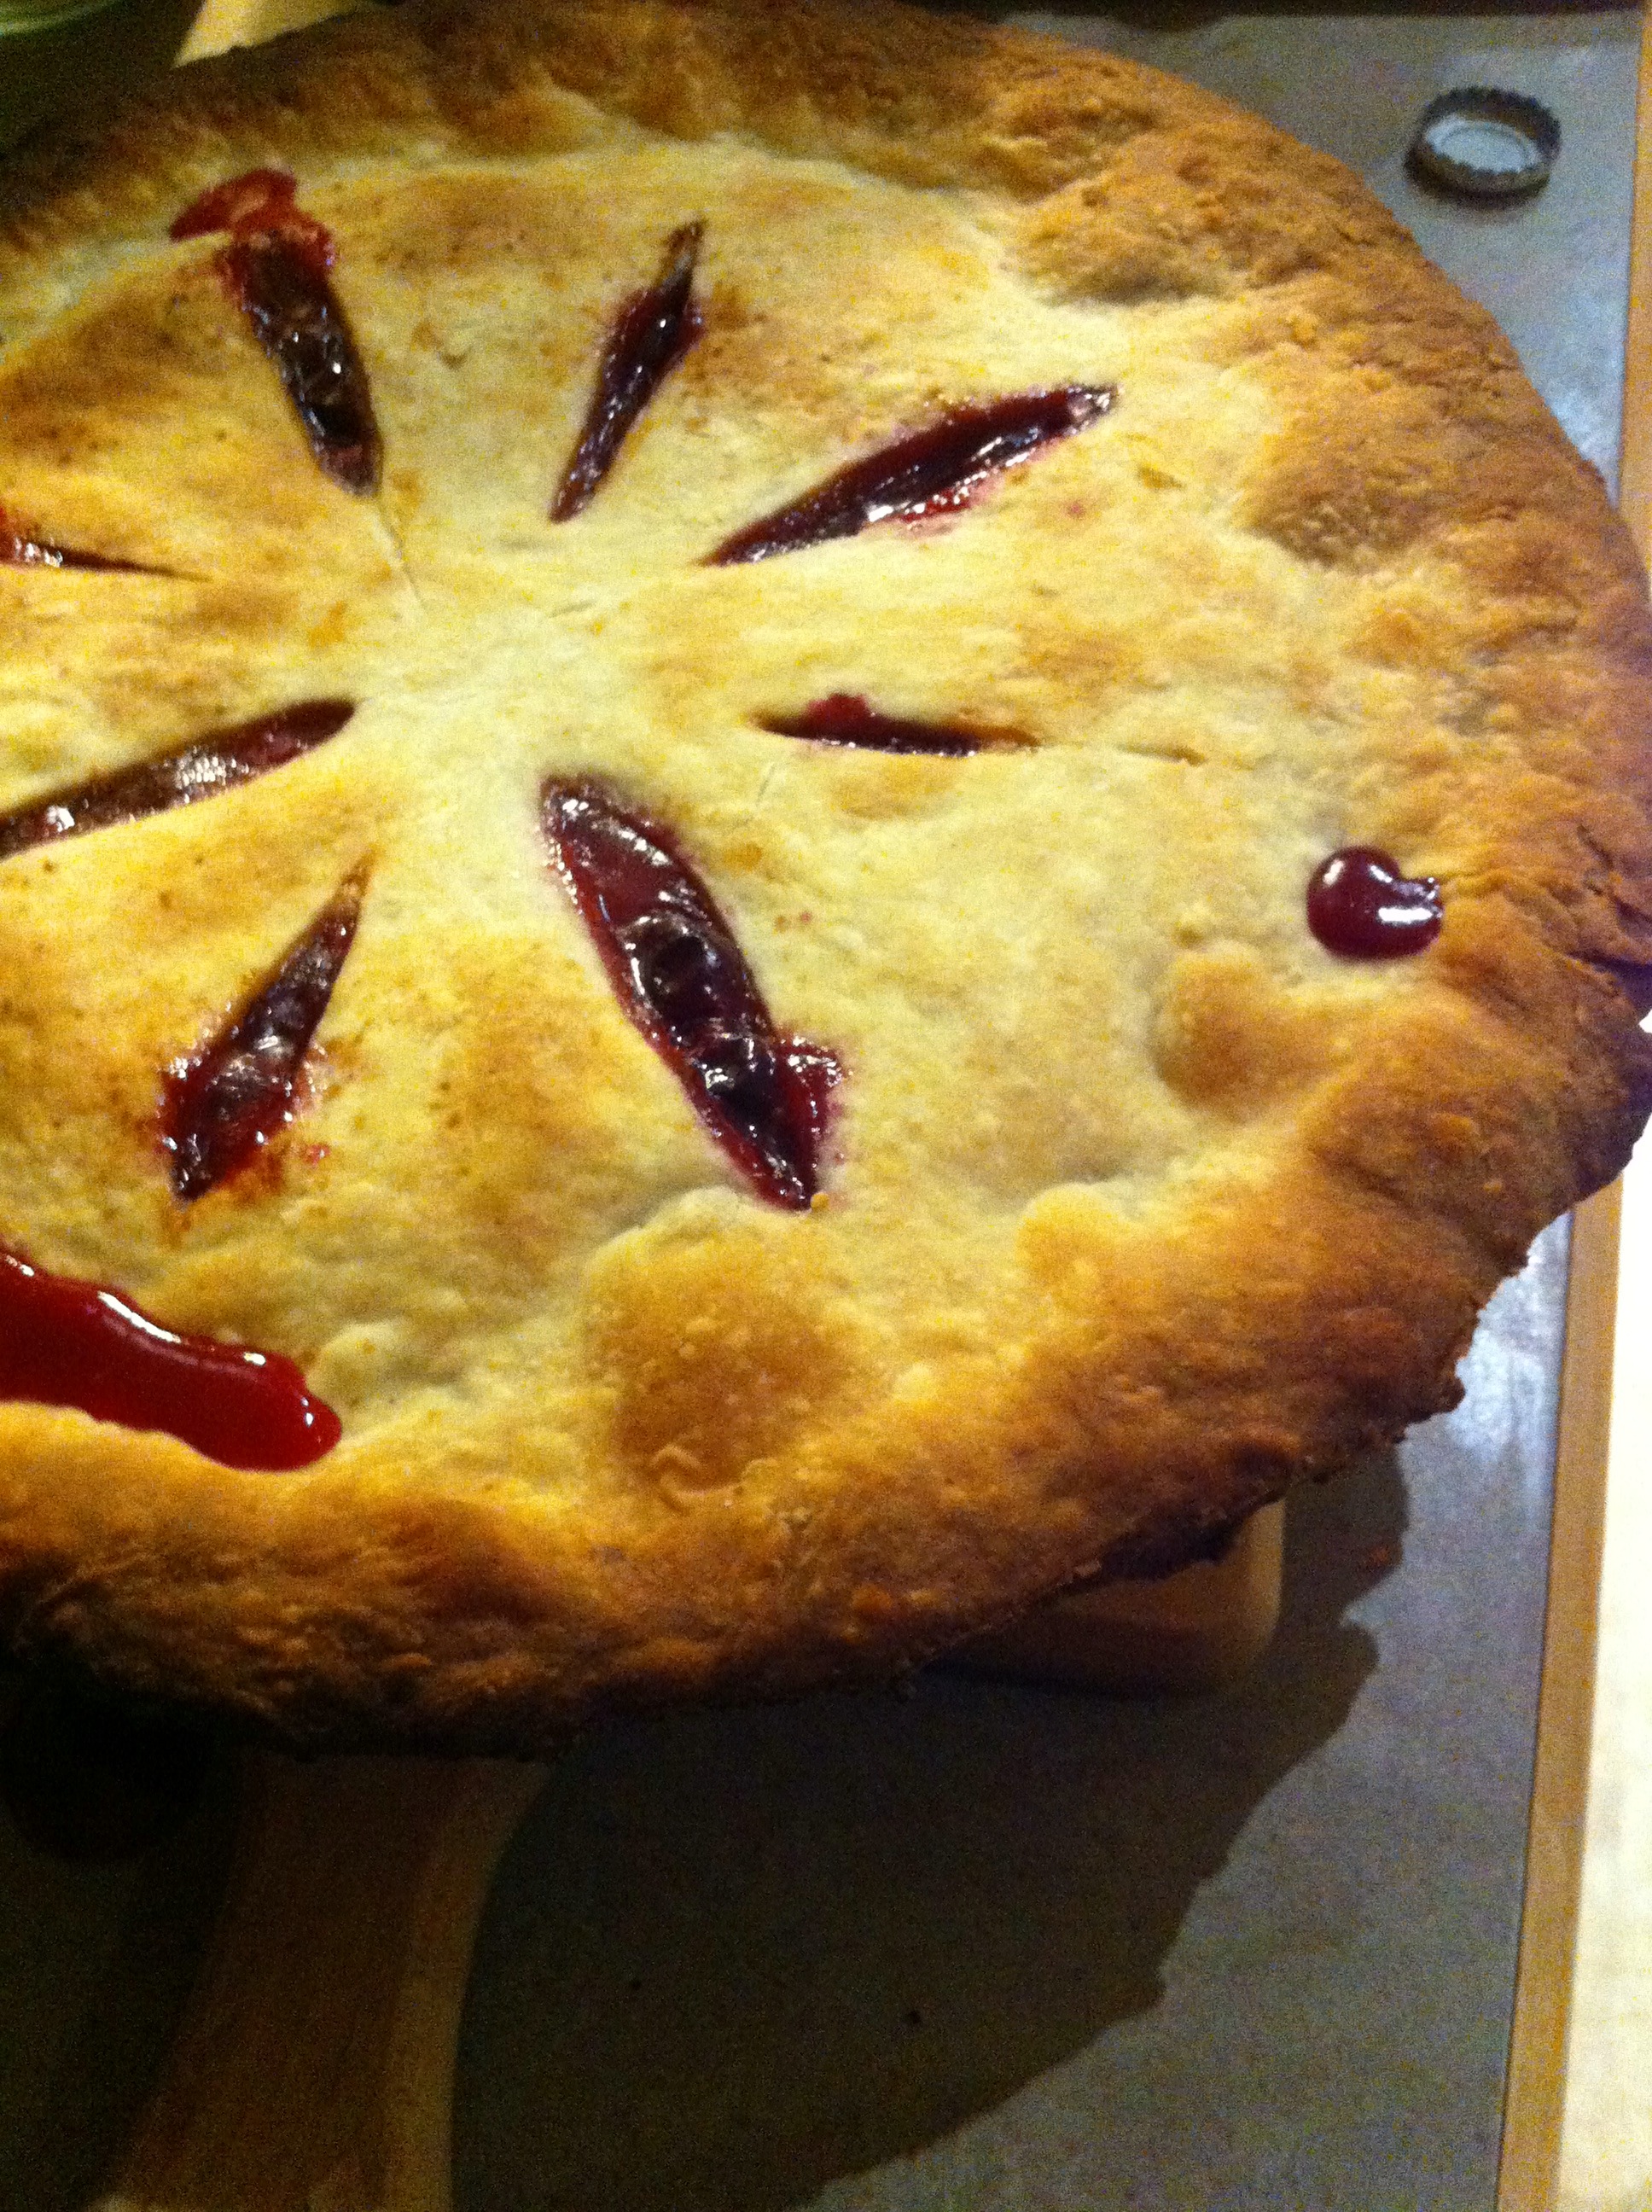
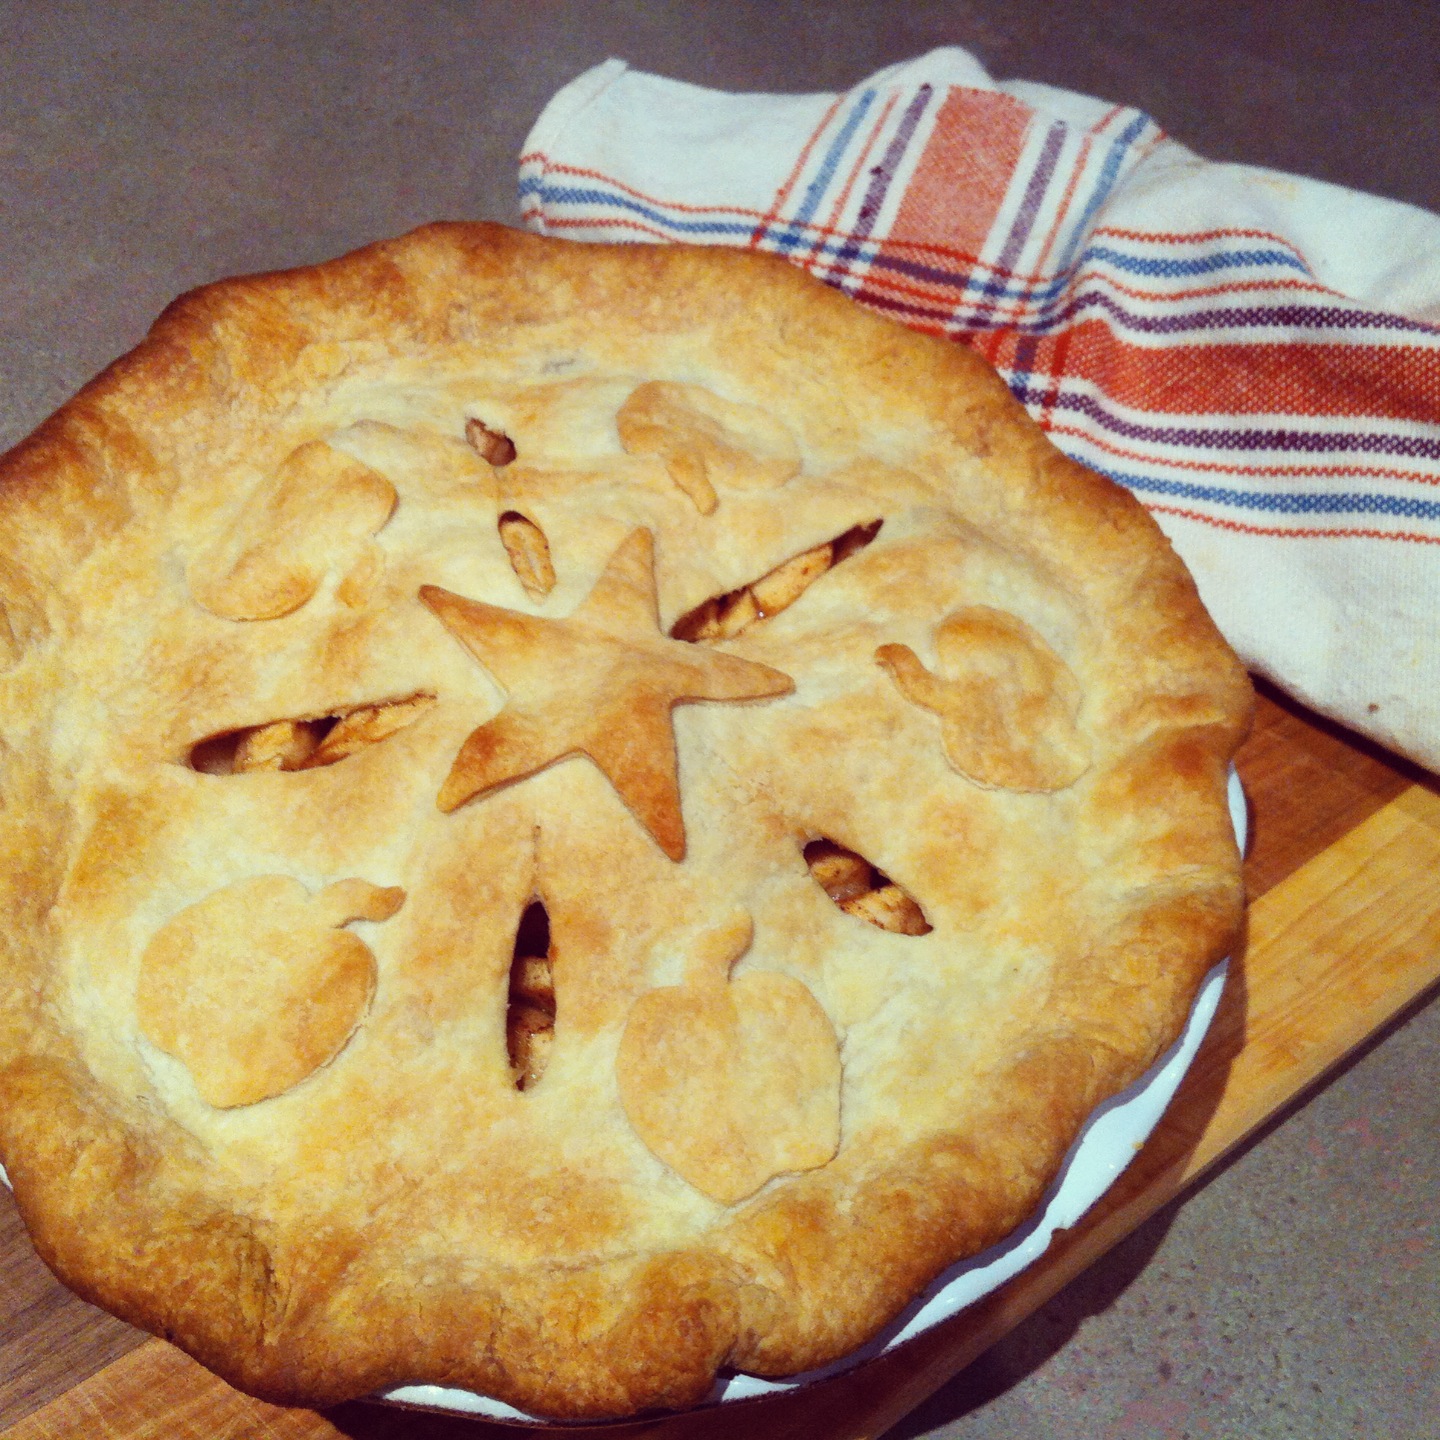
- Dampen the edge over the rim of the pan with cold water; fit on the top crust in which a vent has been cut, press the two pieces together along the edges. Trim and edge. Bake at 425 F until beginning to show colour [Candace’s Note: She says for 12 minutes, I say it depends on your pie.]. (edit)

- 2 cups all-purpose flourPie Pastries
- 3/4 (170g) cup cold butter (or other fat)
- 1/4-1/3 cup very cold water
- 1 teaspoon salt
- Sift flour and salt into a bowl; add cold butter; cut into the flour with a pastry blender or with two knives until, when the bowl is shaken, no pieces larger than a pea appear (Cutting the butter too finely or creaming it into the flour will give a cookie-type crust known as short pastry. Flaky pastry requires small lumps of cold fat to trap layers of air.).
- Measure the water. Sprinkle it over the flour. Mix the flour up from the bottom of the bowl with a fork. As some of the mixture appears to stick together, push it to one side and sprinkle the dry flour with water. Too much moisture makes tough pastry; too little, and the dough will be hard to roll out. Experience helps determine the right amount.
- When the flour appears damp, press it together into a ball; break the ball open; if it crumbles apart more water is required; shape all the dough into a ball but do not knead it.
- Chill the dough while preparing to roll it (If the dough is to be left, wrap it well in waxed paper. When it is removed from the refrigerator, dough must soften up a little before it can be rolled). Divide it in two pieces, the larger piece for the bottom crust, the smaller for the top.
- Dough may be rolled on a lightly-floured board, between two pieces of waxed paper or on a pastry cloth. A clean heavy linen tea towel makes a good substitute for a cloth. Let one end hang over the end of the table so that it may be kept in position. Rub a little flour into it. A child’s white stocking with the foot cut off, or a knitted cotton rolling pin cover pulled over the rolling pin holds flour and keeps the pin from sticking. More important than any piece of equipment is the lightness of touch. If dough becomes warm it will also be much harder to handle.
- Roll the dough from the centre out to the edge in each direction, if a circle of dough is desired; roll it all in the same direction for a rectangle. Pinch together any cracks that form.
- At the end of each stroke the pin should be lifted to be sure the dough is not sticking. After each 3 or 4 strokes, move the pastry on the board to pick up a little more flour, and run a floured hand over the pin. If the dough will not move freely, loosen it carefully with the side of a knife and sprinkle a little more flour on the board.
- The dough should be rolled out to about 1/4 inch in thickness; there is no advantage in having paper-thin pastry. The size should be that of the bottom of the pan plus the depth. To transfer the dough to the pie pan, either fold it in 4, lift it into the centre of the pan and then unfold, or roll it loosely around the rolling pin and unroll it onto the pie pan.
- Place the bottom crust in position; add the filling, cooling if cooked [Candace's note: when I make a pie, I generally like to bake the bottom crust for 15 minutes before the filling goes in. It's a personal preference, but I find the crust is much tastier my way].
- Dampen the edge over the rim of the pan with cold water; fit on the top crust in which a vent has been cut, press the two pieces together along the edges. Trim and edge. Bake at 425 F until beginning to show colour [Candace's Note: She says for 12 minutes, I say it depends on your pie.]. (edit)